Range Tape Calculator
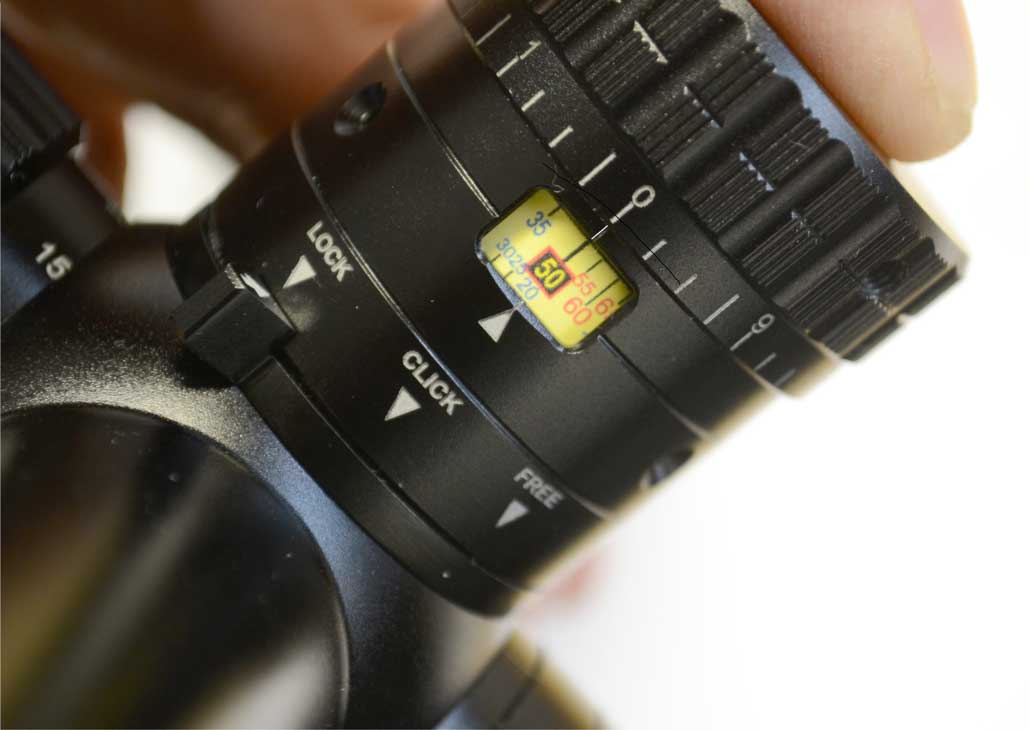
The distance window function on the MTC Viper Pro and King Cobra 8-32 allows you to install a range marked tape customised to your trajectory. This substantially simplifies “dialling in” the distance with the turret. Instead of the usual “clicks count”, you simply rotate the turret until the distance in the window shows the distance to the target and then use the centre of your crosshair, which is always more convenient.
Both scopes generously provide you with plenty of MOA (minutes of angle) adjustment in one turn of distance disc.
42 MOA for viper Pro 3-18×50 and 30 MOA for Viper Pro 5-30×50 and King Cobra 8-32×50
The magnifying head up display built into the rear lens cap also helps significantly to make dialling in the distance fast and accurate.
MTC are offering two options for creating the range tape;
- An automatically generated range tape using calculations generated by the new MTC Ballistic Calculator (three possible methods)
- A manual method, where range scale is printed onto a tape template manually using readily available graphic editing software and a third party calculator.
1. The automatically generated option.
Open the MTC Ballistic Calculator here and follow the instructions below
![]()
Method A (Recommended)
Manually enter the DISTANCE and CLICKS values yourself. The tape will automatically show your results.
Method B (Recommended for AIRGUNS ONLY)
A simple tape calculator is included for your convenience. See the ‘how to’ below. The Range Tape will be generated automatically by completing the online form and then hitting ‘Calculate’.
METHOD C
You can combine Method A & B by completing the online form and then edit the results yourself by changing the data in the Distance and Clicks Column.
CHANGING THE FONT SIZE
You can change the size of the font to suite your preference.
PRINTING OUT THE LABEL
Once you have designed your label, click ‘Print To PDF’ this will create an A4 sheet showing the labels and corresponding tables.
We recommend that you save the PDF file to your computer.
Open the PDF using Adobe Acrobat Reader
Print a test copy and measure the distance between the beginning and end of the label (See the vertical dotted lines)
The label must be exactly 94.2mm wide. If the label size needs adjusting: Go to ‘Print’ in Adobe Acrobat and choose CUSTOM SCALE. The label size can then be adjusted by increasing or decreasing the %.
We are happy to print your Range Tape for you. Simply email your completed PDF file to us at office@mtcoptics.com. The first tape is usually free after which there will be a small charge.
The correct waterproof, Plastic-Coated Labels are available from:
https://www.a4labels.com/products/plastic-poly-matt-white-labels-200-x-289mm/24476
How to generate a range generator for your airgun.
Insert velocity of your airgun in feet per second e.g. 900
Insert pellet weight in grains e.g 15.9
Insert Velocity Retention Factor (VRF) ; for example a Bisley magnum could be .951* a Daystate Sovereign.945. the coefficient will vary depending on the type of rifle and the pellet used and for that reason it is given as a guide.
To work out the VFR of your own rifle download this spreadsheet here.
![]()
Note: you will need to have access to a chronograph and be able to shoot over it at two distances.
Insert zero range in yards e.g 40
Insert scope height (barrel centre to scope centre) in mm e.g. 48
Insert start range in yards e.g. 10
Insert range increments in yards e.g. 5
Download a PDF of Airgun Ballistic Data here
2. The manual option.
To add a customised range tape, please follow these steps:
- Download from this page the range tape template specific to your scope model and trajectory.
- Using your preferred third party Ballistic Calculator generate a table of drops in MOA for distances you would like to be covered by the range tape
- Import the selected template into preferred picture or graphic editor and populate it with distance marking, placing distance numbers against template MOA marks according to the ballistic table.
- Print the range tape.
- Remove the range tape carrier form the turret and affix the range tape as shown.
- reassemble the range tape carrier and turret.
1. Download from this page the range tape template specific to your scope model and trajectory.
We provide two templates for each scope, two for the 3-18×50 and two for 5-30×50.
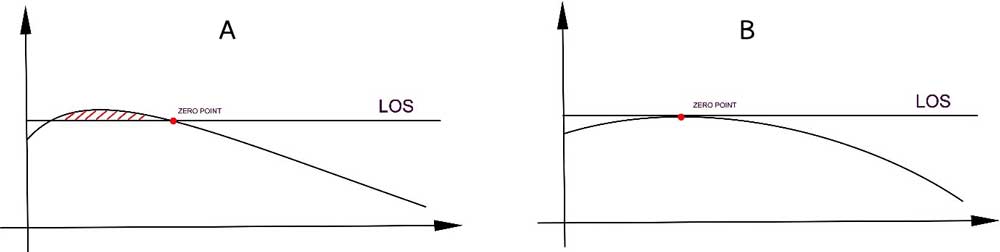
Please choose template “A” if you trajectory goes over the LOS (line of sight), see sample chart below, and choose template “B” if your trajectory does not cross the LOS.
Click on the appropriate template to enlarge it and then right click and select “save as”


2. Using your preferred third party Ballistic Calculator generate a table of drops in MOA for distances you would like to be covered by the range tape
There are several third party Ballistic Calculators, most of them are free to download, and also “on-line” calculators, that can generate the bullet/pellet drop data you will need.
The minimum requirements to generate the information for the range tape are;
- ballistic coefficient (BC) of your bullet/pellet,
- velocity,
- height of the scope above the barrel,
- zero distance,
- maximum shooting range you would like to cover.
When specifying maximum range, please make sure that the drop at this distance will not be more than 30 MOA if you have 5-30×50 and 42 MOA if you have 3-18×50.
As the result of these calculations, you should be able to generate a table like the one below, where distances with specified increments have the corresponding drops in MOA.

3. Import the selected template into preferred picture or graphic editor and populate it with distance marking, placing distance numbers against template MOA marks according to the ballistic table.
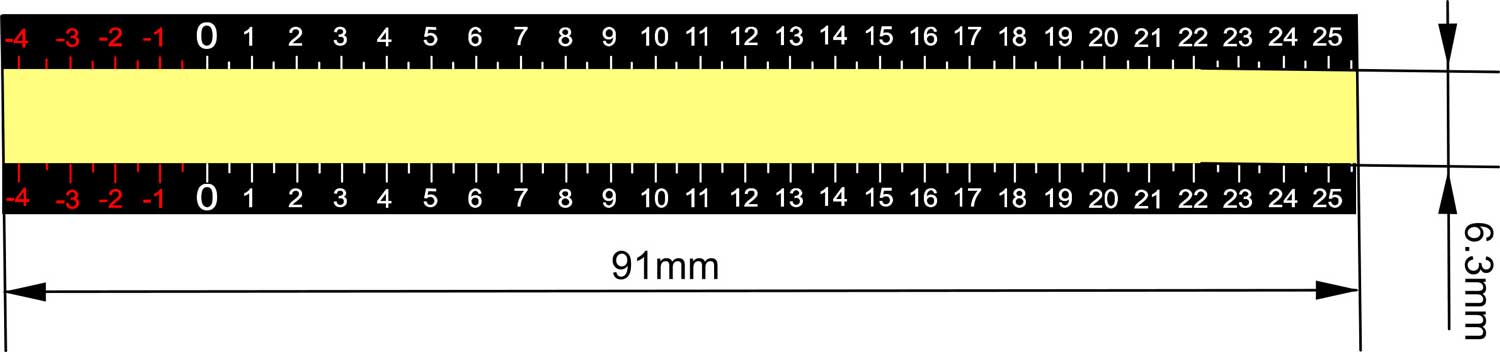
Import the selected template into your preferred picture or graphic editor (for example, Windows Paint is perfectly adequate to design the custom range tape). For your convenience, we made a template with black borders marked on both sides with MOA scale; it will allow you to populate distance marks according to the ballistic table. The tape itself, after you have inserted the distance markers and then printed and cut out should measure 91 x 6.3mm.
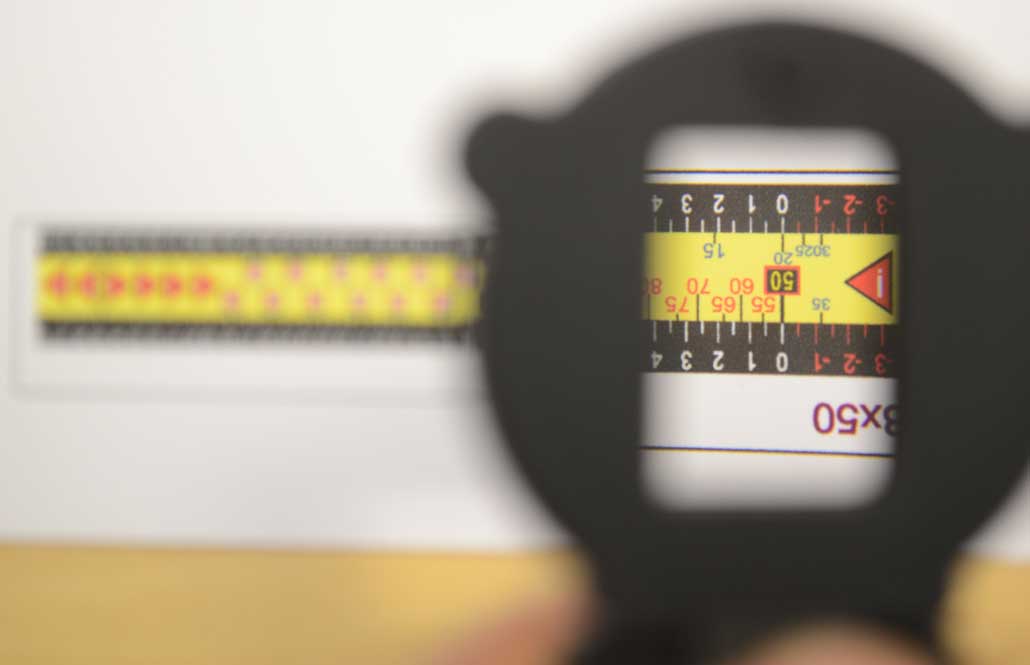
There are several ways to place data on the range tape, and styles and colours can be tailored to the users personal preference. We recommend printing a test tape with your first attempt and looking at it through eyepiece magnifier to see if you are comfortable with the layout. It may be also be a good idea to highlight in colour and style the distances that are most important to your shooting. Also your “down zero” range can be made in a different colour from the rest of the range data.
One example of how the range tape can look is shown below. It is calculated for rim fire ammunition, covering distances from 10 meters to 200 meters, with a Zero at 50 meters. Because the trajectory crosses over the line of sight in this instance, distances from 20 to 50 meters are located to the left of the “0” MOA point. This is why for this kind of trajectory we recommend the “A” type templates.

We recommend placing warning symbols (see red triangles) at either end of the distance scale to warn the user that turning further in either direction will cause the turret to overlap.
Don’t forget at each stage it is a good idea to print a test tape and look at it through the eyepiece magnifier to see if you are comfortable with the layout. (see below)
4. Print the range tape.
We recommend printing the range tape on a photo quality inkjet printer and use Vinyl Self Adhesive Sticker Paper as the preferred media. You may also use photographic inkjet paper.

After the range tape printed, please cut off the black borders, leaving only the light yellow strip. This is now ready to be attached to the range tape carrier.
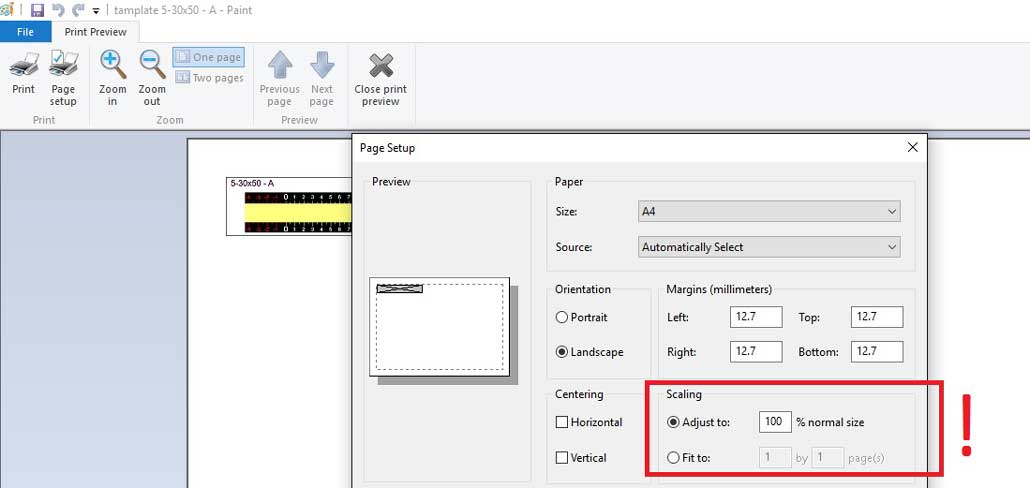
Please make sure your printer setup to print original image without scaling
5. Remove the range tape carrier form the turret and affix the range tape as shown.
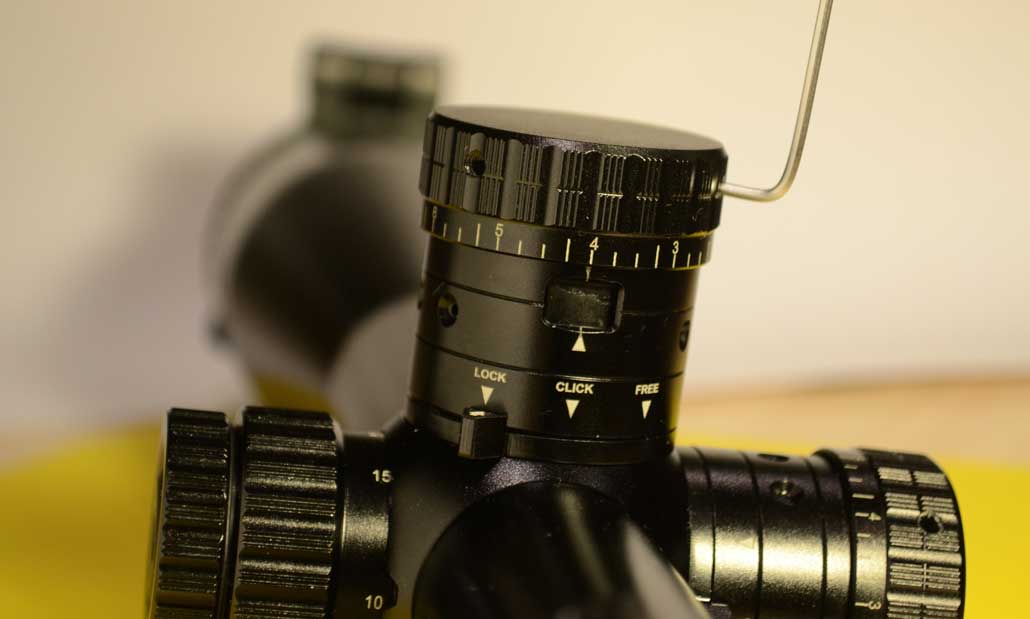
IMPORTANT: Before installing the range tape ensure that your rifle scope is zeroed and that the turret is placed in the “lock” position. next, using allen key, undo the three grub screws surrounding the turret head and remove it.
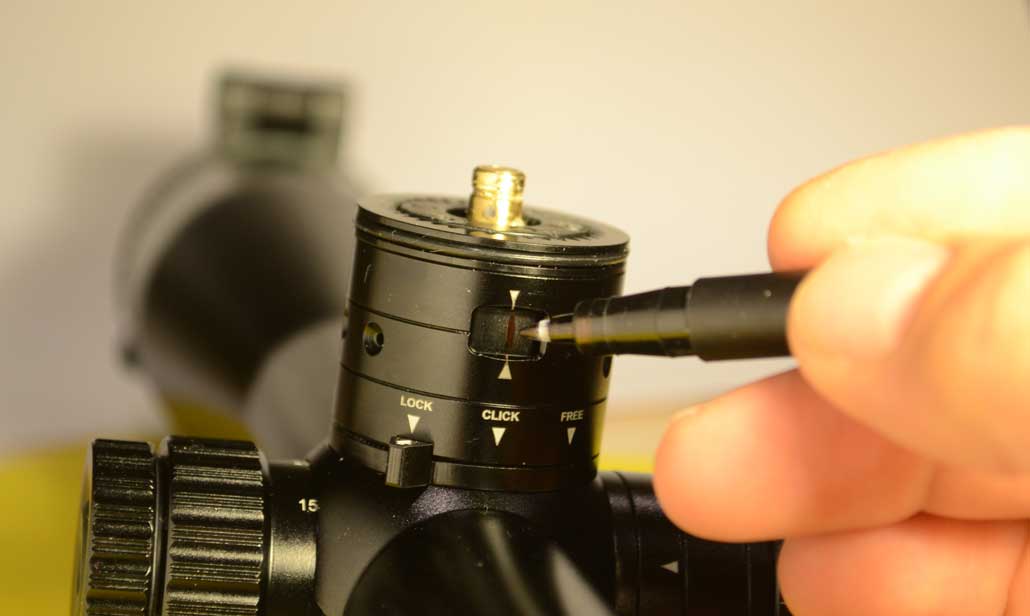
Make a line in the middle of the distance window.
and remove the range tape carrier by pulling it upwards.
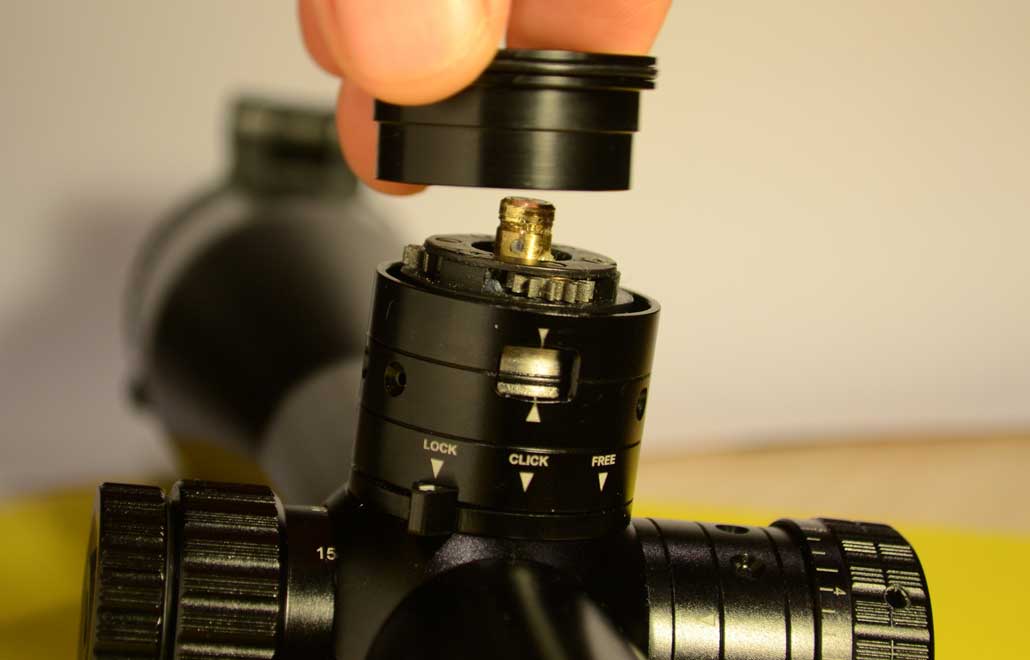
Extend the line to the top of the range tape carrier.

Align the zero distance mark on the range tape with the line on the range tape carrier and attach the tape around it.

If you are not using self-adhesive paper, you can place a small amount of adhesive on the tape before attaching it to the carrier.

Install the carrier back into the turret, making sure that the zero distance mark locates in the middle of the distance window, and the line on the range tape associated with the zero distance is centered with the marking on the turret body.

Replace the turret cap and lock it in place with the three grub screws.
Your scope is set !