HOW TO RANGE-FIND WITH MIL BASED CROSSHAIRS
SHOOTERS MAY BE MISSING THIS TRICK WITH THEIR MIL-DOT SCOPES
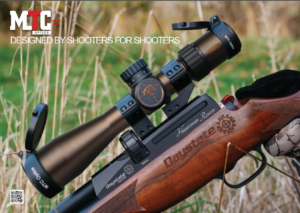
Riflescopes that feature a mil-dot reticle are in vogue, with many scope manufacturers developing their own crosshair designs to incorporate ‘mil’ spacings (not always signified by dots). Airgunners favour mil-dot optics primarily because they tie in so well with a pellet’s trajectory, which follows a more pronounced flightpath than a high-powered bullet fired from a rifle. An airgun pellet is also more susceptible to wind drift. With so many aiming points to reference in the sight picture of a mil-dot scope, the airgun shooter can therefore easily make allowances for holdover, holdunder and windage when lining up the shot.
Yet using mil-dots solely for aiming purposes isn’t really taking full advantage of the concept behind the system. Indeed, it’s likely that most airgunners are missing a trick with such scopes.

Figure 1. Standard type mil-dot crosshair. The spacing between each dot is equivalent to one milliradian, or 1 mil
The mil-dot system was primarily developed for range-finding in military applications, where bracketing a target between the dots could provide a rough and ready estimation of its downrange distance. While there’s no denying their effectiveness as a multi-aimpoint crosshair for airgun use, the principles behind the system also make it an ideal tool for determining how far away your target is. So, for the airgun shooter, looking down a mil-dot scope offers the best of two worlds: plenty of aiming stadia and an integrated range-finding system!
WHAT IS A MIL ?
Mil-dot reticles are so called because they revolve around a unit of angular measurement known as a milliradian, or ‘mil’ for short. One mil equates to 36 inches at 1,000 yards; more easily converted in metric as 10cm (100mm) at 100 metres. Being angular, the measurement value of a mil will change over distance, although its relationship is a linear constant. For example, one mil will equate to 20cm at 200m (double that of the 100m measurement), 5cm at 50m (half that of the 100m measurement) and so on.
For most airgun shooting scenarios, distances are commonly 50 metres and below, but the mil-dot system still translates well. The table in figure 2 shows the benefit of working in metric values; if you wanted to know the value of a mil at 25 metres, for example, it doesn’t need much brain power to work out that it would be 25mm!

Figure 2. The measurement of a mil is dependent on distance, but it’s easy to remember!
Besides dots, mil measurements are often represented by short stadia incorporated into the crosshair’s design, giving the shooter a kind of ruler to measure by. As there are advantages to measuring in smaller increments, advanced reticles like MTC Optics’ SCB2 and AMD also offer the shooter measuring marks in half-mil steps. By halving the measurement reference of a mil, smart crosshairs like MTC’s provide an even more precise aiming and range-finding system.
BRACKETING
If you know the size of your target, you can quickly gauge its distance by simply ‘bracketing’ it between the mil (or half-mil) marks on your scope’s reticle and taking a note of how many of these it spans. Conveniently, you can undertake this as part of the aiming process, making it a speedy affair.
Take this scenario as an example (figure 3). You’re lining up on a bird pest, perched on a branch an unknown distance in front of you. The bird measures approximately 200mm from beak to branch. So, because it ‘brackets’ between a five-mil spacing on your MTC scope’s SCB2 graduated crosshair, you can confidently estimate its range to be 40 metres. How? Through a dead easy formula: target size divided by mil spacings. In other words: 200mm divided by 5 mils… equals 40m.
Figure 3: Using the bracketing system in conjunction with the SCB2 crosshair on this MTC Optics scope indicates the crow’s range is (200 ÷ 5 =) 40 metres. The hunter can then take aim using the appropriate aiming mark on the reticle
Take another example – a feeding rabbit. You approximate the top of its body to be 150mm off the grass and can bracket it between three mil spacings. So, 150 ÷ 3 = 50; the rabbit is around 50 metres away. Handily, you can then select the aiming dot or stadia relevant to that distance on your scope’s crosshair to allow for holdover. Easy!
The half-mil system comes into its own for much smaller targets, such as the ‘kill area’ of a knock-down silhouette, where bracketing measurements need to be far more precise. As such, half-mil reticles are favoured by outdoor competition shooters, though the range-finding calculation is the same.
Suppose you are aiming at a metal silhouette with a 12mm diameter ‘kill’ disc. If you can bracket the disc between a single half-mil spacing, then the distance of the target from you must therefore be 12 ÷ 0.5 = 24 metres. Likewise, if you can bracket it between three half-mil spacings (i.e. 1.5 mils), then its range must be 12 ÷ 1.5 = 8 metres (figure 4).

Figure 4: The more precise half-mil markings of MTC’s SCB2 crosshair are useful for smaller targets. The 12mm diameter inner ‘kill’ of this knock-down may look tricky, but at least you know the target’s exact range – 12 ÷ 1.5 = 8 metres!
Given how easy the milliradian formula is, making a spur of the moment range calculation is quick as well as accurate. However, why not print off the table in figure 5 to keep in the pocket of your shooting jacket for an always-at-hand reminder?

Figure 5: Assess the size of your target to then easily estimate its range based on the number of mil spacings it can be bracketed by. The quick calculation is: distance (mtrs) = target size (mm) divided by number of mils
BRACKETING WITH ZOOM SCOPES
As simple as the mil bracketing system is to range-find with, there is something to be aware of if you have a variable power scope: the focal plane where the scope’s reticle is located. Scopes fall into two types, those where the reticle is in the first focal plane (FFP) and those where it is in the second focal plane (SFP) – see here.
With a FFP scope, both the target size and reticle remain in proportion to each other, regardless of the magnification you set. Therefore, you can use the bracketing system to range-find your target on any magnification with these scope types.
However, with a SFP scope, you can only accurately use the bracketing system on one magnification setting: the ‘true’ power. Though this is often 10x magnification, it can vary between scope manufacturers and models, so it’s an important number to know on your own telly. If, for example, your scope’s mil-dot crosshair is ‘true at 10x’, but you always shoot on 12x power, you will have to wind down the magnification to 10x when range-finding using the bracketing method.